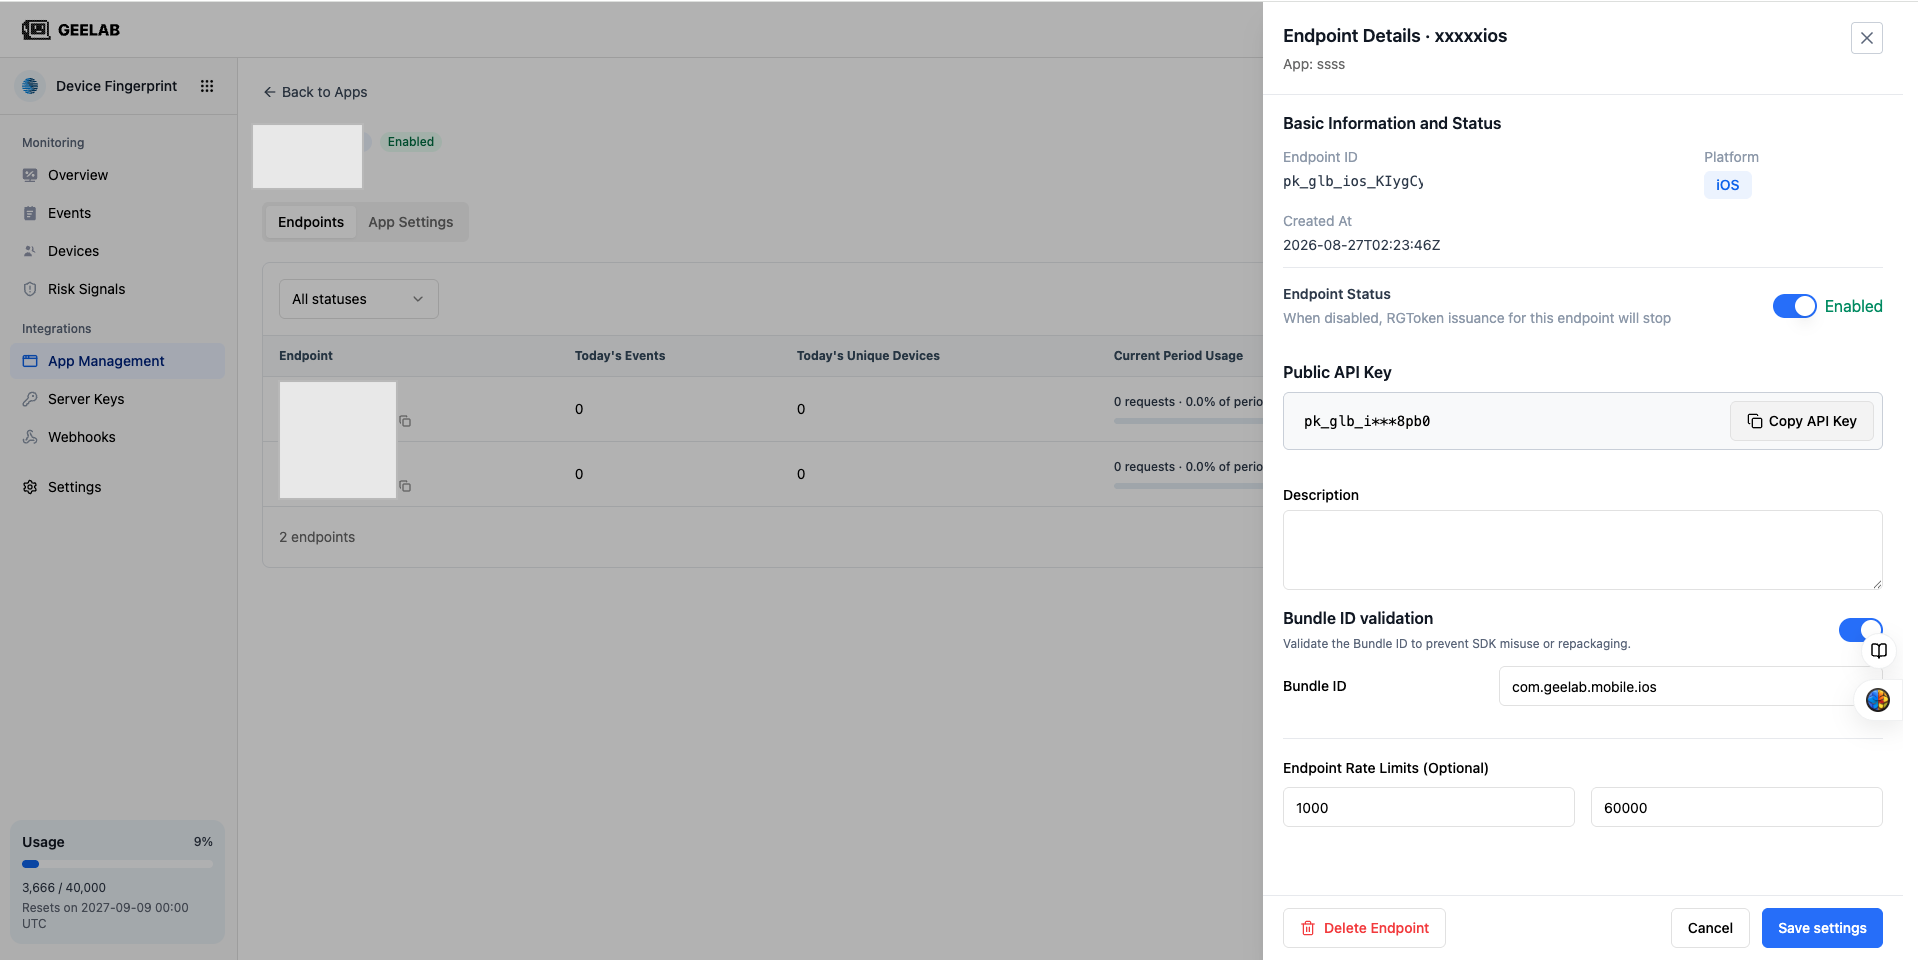
Create the first integrations
An integration represents a specific Web, iOS, or Android access instance in your application. After creation, the system generates an independent Public API Key for it.
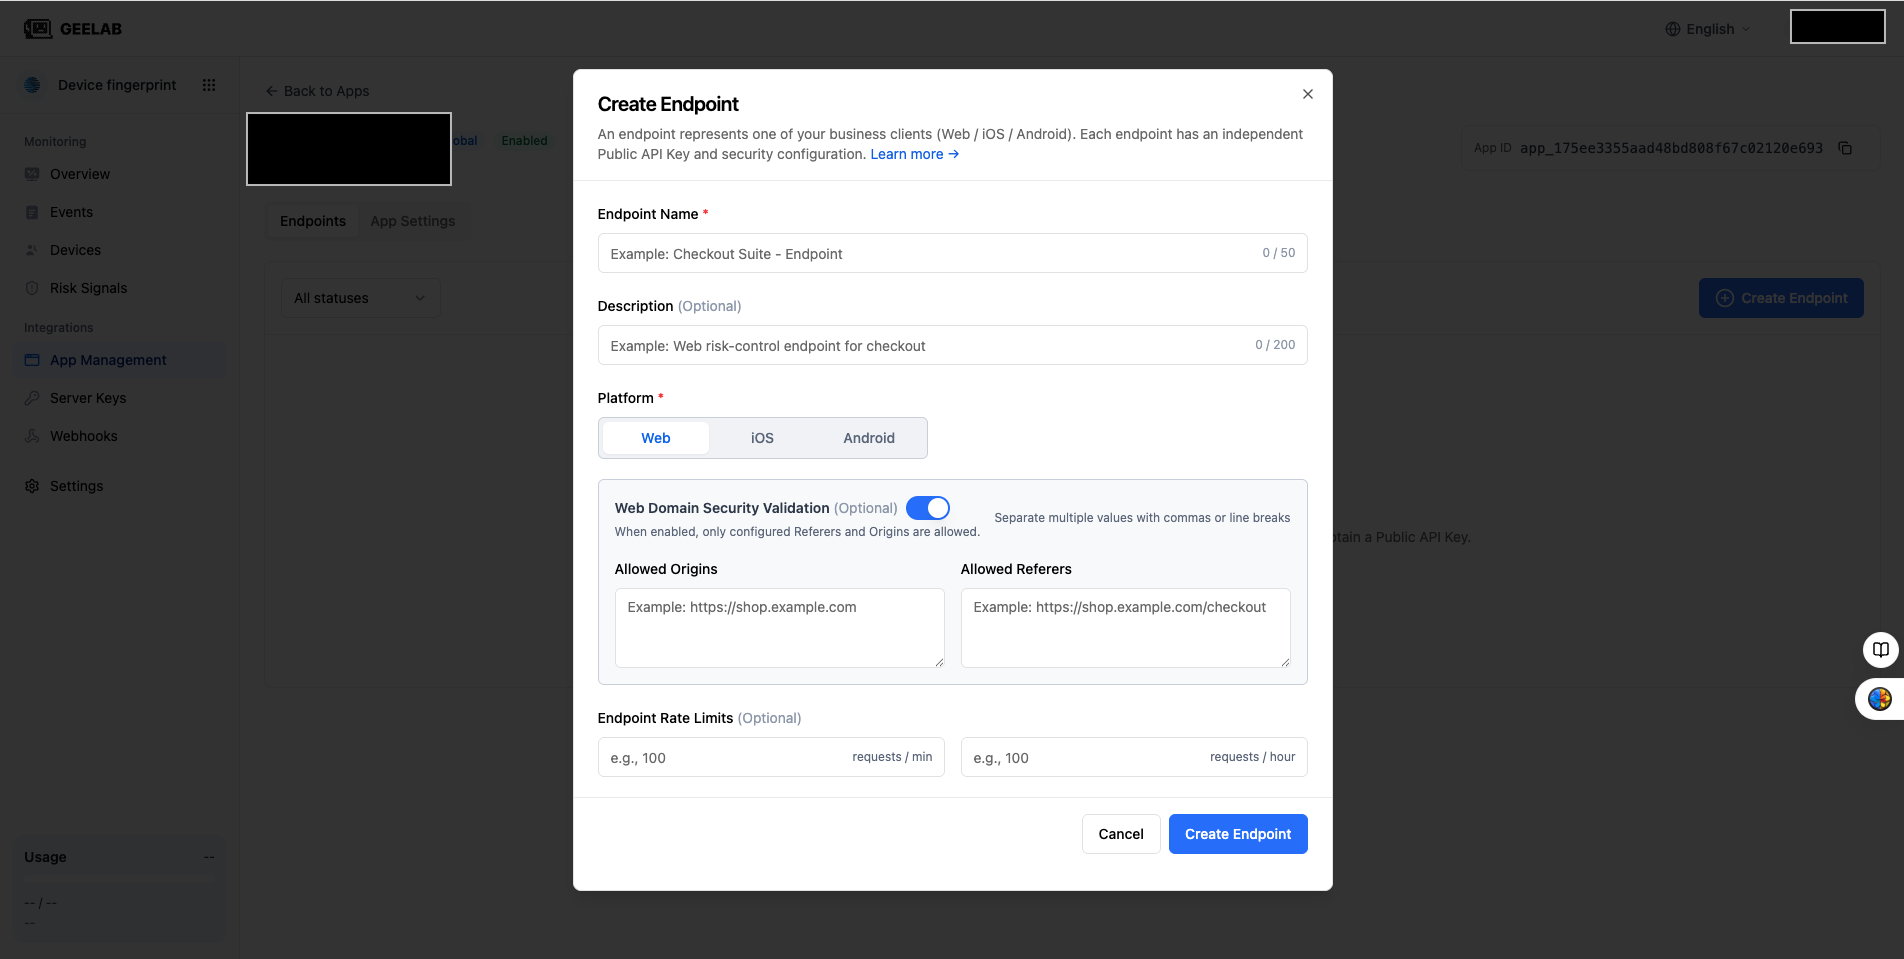
Open the pop-up window for creating an integration
It can be created through any of the following entrances:
- Click Create the first integrations in the application creation success prompt.
- Enter Application Management → Application Details → integrations and click New integrations.
The console, interface, prompt copy and documents should all use "Integration". If the current version still displays "Scene Node", both represent the same object in this guide.
Fill in basic information
Fill in the name and description of the integration, and select the platform.
Include both the integration point and platform in the name, for example:
Checkout Page Web
Storefront Client iOS
Storefront Client Android
Whether modification is allowed after the platform is created depends on the current console. To avoid confusion about the Public API Key, security configuration, and attribution, treat the platform as a fixed attribute.
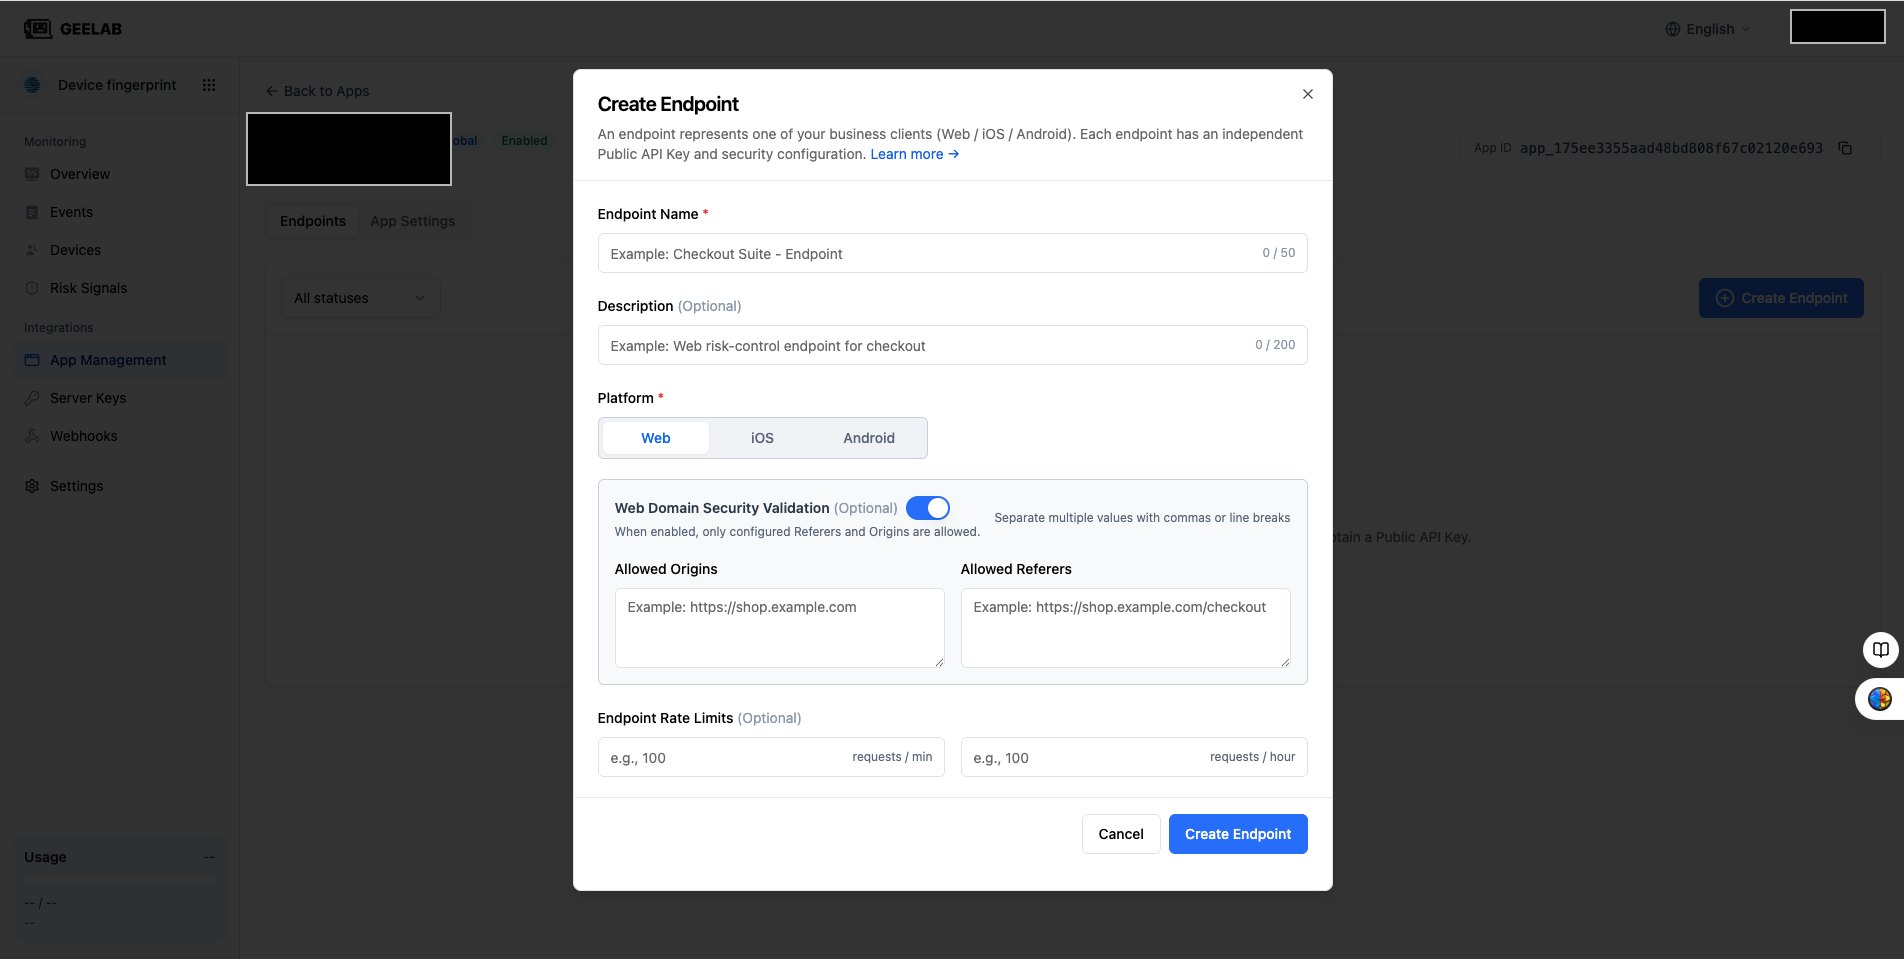
Configure Web integrations
After selecting Web, configure the sources that are allowed access.
Allowed Origins
Origin usually consists of protocol, domain name and port, and does not include the page path.
Valid example:
https://www.example.com
https://checkout.example.com
https://staging.example.com:8443
Do not enter only example.com. Whether wildcards and local development addresses are allowed depends on the console's current verification rules.
Allowed Referers
If the product supports Referer verification, you can further restrict the page paths allowed to call the SDK. The path and wildcard format should be filled in as prompted by the field.
Example:
https://checkout.example.com/*
https://*.example.com/pay/*
When officially accessing, the source range should be as precise as possible to avoid whitelisting uncontrolled domain names.
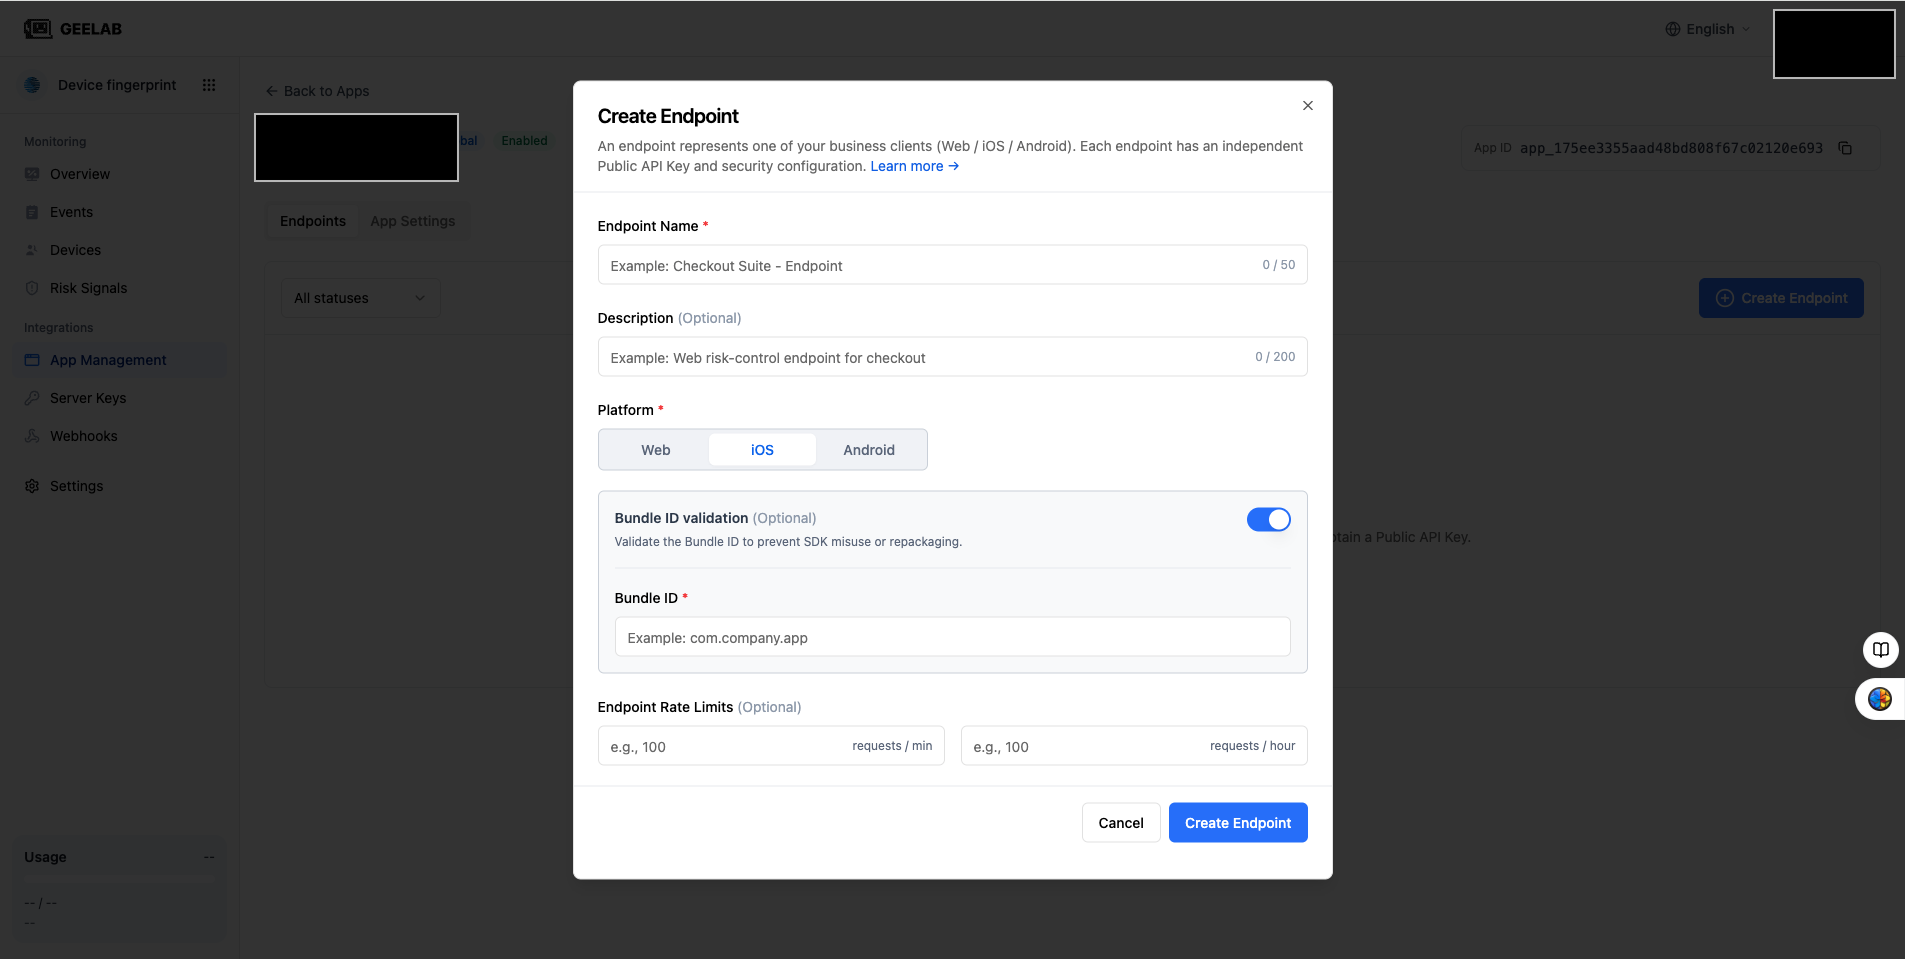
Configure iOS integrations
After selecting iOS, you can enable app signature verification.
After enabling it, fill in the Bundle ID as required by the console, for example:
com. company. appThe Bundle ID should exactly match the actual built and published app. Configuration errors can cause legitimate client requests to be rejected.
If the test version and the official version use different Bundle IDs, the integrations should be planned separately or corresponding permission rules should be configured.
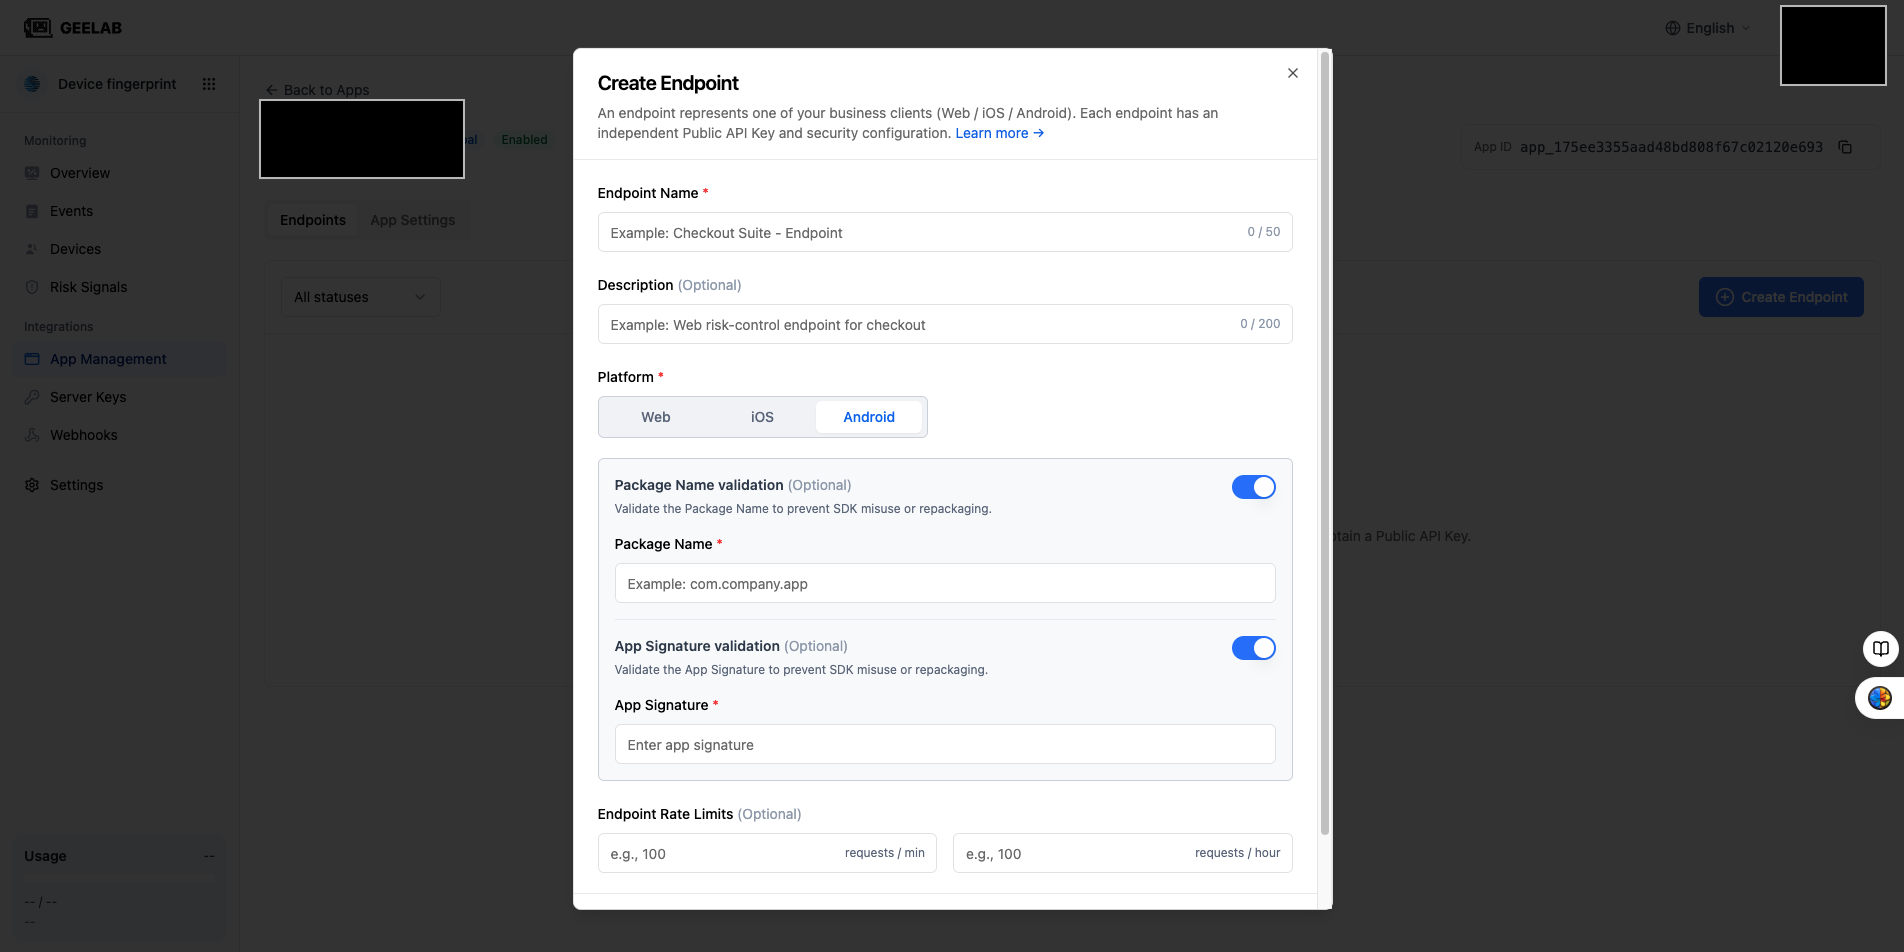
Configure Android integrations
After selecting Android, you can enable application signature verification.
After enabling, fill in the following as required by the console:
- Package Name, for example
com. company. app. - App Signature, which is the signature information used by the actual published application.
Package Name and App Signature must be consistent with the actual installation package. If Debug, test and official versions use different signatures, test and production access methods should be designed in advance.
Set initial rate limits
The integration can set request limits per minute and hour to reduce the risk of Public API Key being stolen or abnormal traffic consumption quota.
When configuring for the first time, you can refer to the normal peak value settings of the business and reserve a reasonable margin:
Recommended initial threshold = recent normal peak × 1.5 to 2The above are only planning methods, not fixed values applicable to all businesses. Marketing, ticketing or payment services with obvious peaks should be set up in conjunction with capacity assessment.
Note when configuring:
- The per minute limit multiplied by 60 should not be higher than the hourly limit.
- Whether leaving it blank means disabling access-level restrictions is subject to the page description.
- Even if access-side traffic limiting is not configured, requests may still be affected by application-level restrictions, organization quotas, and subscription status.
- After exceeding the limit, Geelab may reject this request; it will automatically recover after entering the next time window.
Create and obtain Public API Key
After completing the configuration, click Create integrations. After the creation is successful, the system generates the Public API Key of the integrations.
Click the copy button in the access list or details to copy the complete Public API Key. After copying:
- Provide the key to the R&D personnel responsible for client access.
- Only used for the platform corresponding to the current integrations.
- Do not use it to call the Server API.
- Do not remove configured source verification, application signature verification, or rate limiting.
The Public API Key is a client-side key and may appear in client code. Protection relies primarily on origin verification, application signature verification, rate limiting, and server-side fraud detection. Unlike the Public API Key, the Region server key must remain secret.